How To Set Up Your GMA E-mail On Your Apple iPhone or iPod Touch

Need help setting up your GMA e-mail on your iPhone or iPod Touch? We have developed step-by-step instructions to help guide you through the process. If you need
additional assistance, don't hesitate to contact Technical Support at 888-321-0815.
Click here for step-by-step instructions. http://www.gmavt.net/support/iphone.shtml
Ask The
Help Desk What Should I Do If I Lose My Internet Connection?
Question: Every once in awhile, I lose my Internet connection at home. Do you have any troubleshooting tips for me? What can I do to get back online?
Answer: In the event of a temporary service outage or if you lose connectivity, you may need to reboot your modem. If your network features a router,
it will need to be rebooted as well. Since the sequence in rebooting is important, we'll review the procedure one step at a time:
1. Check to make sure your modem has power.
2. If your modem has power, go ahead and disconnect the power to the modem and leave the power off for about 20 seconds.
3. Reconnect the power and allow the modem time to receive a new Internet connection. When the "link" light becomes active, your modem is connected
(rebooted) to the network.
4. If you are using a router, disconnect the power to the router and leave the power off for about 20 seconds. Restart the router and your Internet connection should
be restored.
5. If you are still not getting a connection, you may also want to try restarting your computer. Sometimes a quick computer reboot does the trick.
If you continue to have problems, please don’t hesitate to contact Technical Support at 888-321-0815.
Short
Tutorial Sending E-mail Messages To Groups Of People
Do you frequently send the same e-mail message to groups of people such as close friends or members of a club? If the answer is yes, how do you do it? If you
individually select the e-mail addresses of recipients and place them in the "To" field, we encourage you to consider a better way. Take a few minutes to
create separate groups with these e-mail addresses and send future messages to the name of the group instead. Your recipients will appreciate the change, since their
individual e-mail addresses will no longer appear in the "To" field (which can potentially expose them to scammers). Here's how to do it:
Sending Group E-mail Messages Using ...
E-Mail Program: Outlook Express 6
Computer Operating System: Windows XP
1. With Outlook Express open, click your cursor arrow on the "Addresses" icon on the toolbar. The Address Book - Main Identity window will appear.
2. Click on the "New" button on the toolbar and select "New Group..."from the resulting drop-down menu. The Properties window will appear.
3. Type in a name for your new group in the "Group Name:" field. "Work," "Family," or "Friends" are good examples. (Note that
the name you use for the group is the name that will appear in the "To" field of future e-mail messages.)
4. Next, click on the "Select Members" button on the right side of the window. The Select Group Members window will appear showing a list of your contacts
in the left-hand pane of the window.
5. Highlight a name, multiple names, or all of the names from the listed contacts and click the "Select" button located between the two panes. This will
move the highlighted contact or contacts into the "Members:" pane. Click on the "OK" button when you have added the contacts and click "OK"
again to close the new group's Properties window.
6. You will see the new group name folder listed under the "Main Identity's Contacts" folder located in the Address Book – Main Identity window and
with your other saved contacts. Click on the red "X" to close the window. You are now ready to begin using the new group name when you create new e-mail
messages.
Sending Group E-mail Messages Using ...
E-Mail Program: Mozilla Thunderbird
Computer Operating System: Windows XP and Windows Vista
1. With Thunderbird open, click your cursor arrow on the "Address Book" icon on the toolbar. The Address Book window will appear.
2. Click on the "New List" button on the toolbar. The Mailing List window will appear with the "Personal Address Book" already selected in the
"Add to:" field.
3. Type in a name for your new group in the "List Name:" field. "Work," "Family," or "Friends" are good examples. (Note that
the name you use for the group is the name that will appear in the "To" field of future e-mail messages.)
4. Next, in the "Type e-mail addresses to add them to the mailing list:" field, begin typing in the names of the contacts from your Address Book that you
would like to add to this new group. Click on the "OK" button when all contacts have been added.
5. You will see the new group name folder listed under the "Personal Address Book" folder located in the Address Book window and with your other saved
contacts. Click on the red "X" to close the window. You are now ready to begin using the new group name when you create new e-mail messages.
Sending Group E-mail Messages Using ...
E-Mail Program: Windows Mail
Computer Operating System: Windows Vista
1. With Windows Mail open, click your cursor arrow on the "Contacts" icon on the toolbar.
2. On the next screen, click on the "New Contact Group" button. The Properties window will appear and the "Contact Group" tab should be selected.
3. Type in a name for your new group in the "Group Name:" field. "Work," "Family," or "Friends" are good examples. (Note that
the name you use for the group is the name that will appear in the "To" field of future e-mail messages.)
4. Next, click on the "Add to Contact Group" button. The Add Members to Contact Group window will appear showing a list of your contacts.
5. Highlight a name, multiple names, or all of the names from the listed contacts and click the "Add" button. This will move the highlighted contact or
contacts into the "Contact Group" pane located in the Properties window. Click on the "OK" button when all contacts have been added.
6. You will see the new group name listed with your other saved contacts. Click on the red "X" to close the window. You are now ready to begin using the new
group name when you create new e-mail messages.
Sending Group E-mail Messages Using ...
E-Mail Program: Address Book 4.1 for Mail.app
Computer Operating System: Mac OS X 10.5
1. With Address Book open, click on the address book icon titled "All" in the Group column of the Address Book window. A list of all of your addresses in
the Address Book will appear in the "Name" column.
2. Highlight a name, multiple names, or all of the names from the listed contact names by holding down the Command key (the key with the Apple logo next to the space
bar), while clicking on the addresses you would like in the new group you are about to create.
3. Click your cursor arrow on the "File" menu, and select "New Group From Selection" from the resulting drop-down menu. A new untitled group will
appear in the "Group" column and all the names you selected in step 2 will be visible in the "Name" column.
4. Type a name for the group in the highlighted field that says "Group Name." "Work," "Family," or "Friends" are good
examples. (Note that the name you use for the group is the name that will appear in the "To" field of future e-mail messages.) |

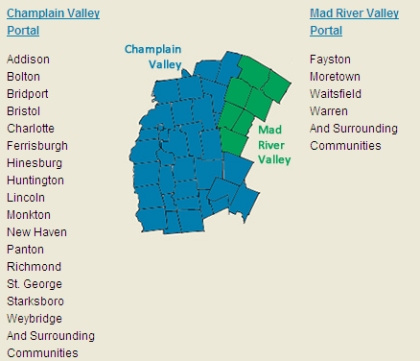
 In the true spirit of the holiday, Waitsfield and Champlain Valley Telecom coordinated their annual gift drive. In addition to employees donating gifts, customers
also brought in donations to be placed under the giving trees at our offices. Hundreds of gifts for all ages were collected and were delivered to local community organizations for distribution. Happy Holidays from Waitsfield and Champlain Valley Telecom!
In the true spirit of the holiday, Waitsfield and Champlain Valley Telecom coordinated their annual gift drive. In addition to employees donating gifts, customers
also brought in donations to be placed under the giving trees at our offices. Hundreds of gifts for all ages were collected and were delivered to local community organizations for distribution. Happy Holidays from Waitsfield and Champlain Valley Telecom!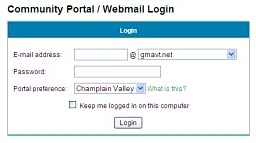 You will notice some
changes to the Webmail login. We
will now include a drop down box asking you to select your domain name (gmavt.net, madriver.com, etc.). In addition, you will also need to select your portal preference.
Once logged in for the first time, these settings will be saved for you.
You will notice some
changes to the Webmail login. We
will now include a drop down box asking you to select your domain name (gmavt.net, madriver.com, etc.). In addition, you will also need to select your portal preference.
Once logged in for the first time, these settings will be saved for you.  From
From